How to Make a Transparent Background SVG from a PNG
You trace a logo, place it on a colored shirt mockup or a website banner, and a white square sits behind it. That square is part of the SVG. Here is why it shows up and how to get rid of it.
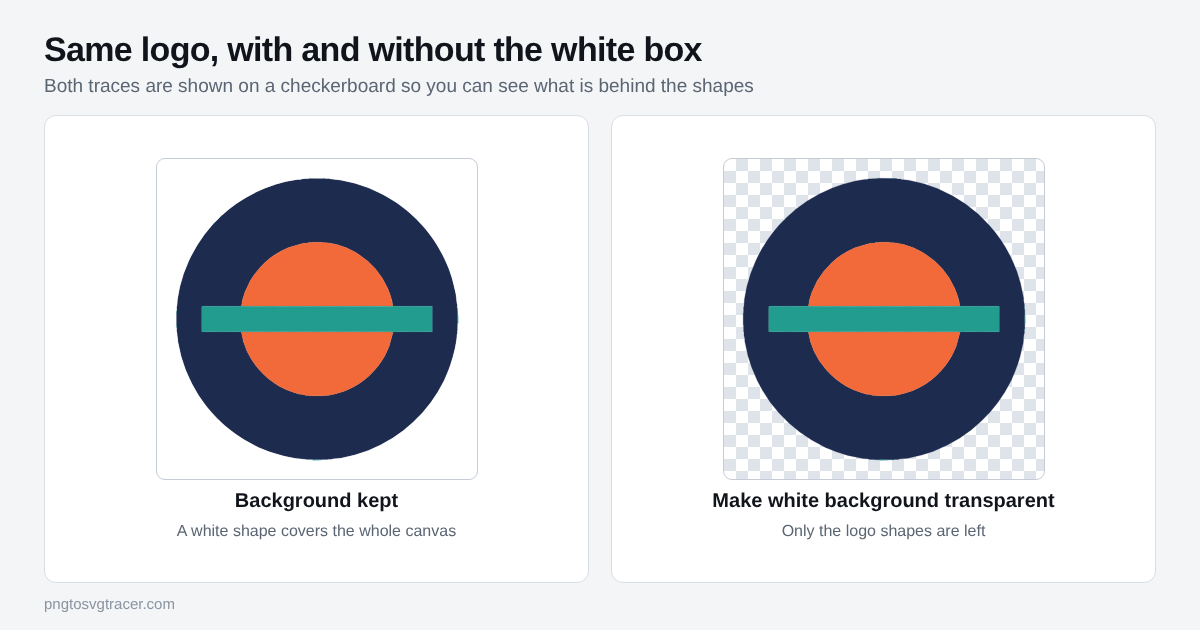
Why a white box appears
A PNG or JPG is a grid of pixels, and a logo on a white page has white pixels all the way around it. When a tracer reads those pixels, white is just another color. With the background kept, the SVG gets one big white shape the size of the whole canvas, and the logo shapes sit on top of it.
On a white page you never notice. On anything else you do.
JPG files cannot hold transparency at all, so a JPG logo always arrives with a solid background. A PNG can be transparent, and the tracer treats mostly transparent pixels as empty. A PNG saved with a white background is the same as a JPG here: the white is real.
The setting that fixes it
Open the PNG to vector page or the logo to SVG page and drop your file in.
- Set Style to Logo or icon. Illustration and Photo have the option too.
- Find the checkbox called Make white background transparent. It is on by default, so check that it has not been switched off.
- Set Colors to the number of colors in the logo. Count only the logo, not the background.
- Look at the preview. Raise Remove small specks if stray dots are left behind.
- Download the SVG.
With the box ticked, white areas that touch the edge of the image are dropped, along with the pale fringe around the artwork. The SVG then holds only the logo shapes.
Black and white logos are simpler
If your logo is a single color, choose Black and white shapes instead. That style only draws the dark parts. Light pixels become empty space, so there is no white shape to remove. Use the Threshold slider to decide where dark ends and light begins.
This is also the better choice for a signature, a stencil or anything you plan to cut, because you end up with one set of solid shapes.
Check that it worked
The preview can fool you, because a white box on a white page looks the same as no box. Test it on a color.
- Drag the downloaded SVG into Canva or Figma and place it over a colored shape.
- Or place it on a slide or document that has a colored background.
If you see the logo floating on the color with nothing around it, you are done. If you see a square, go back and look at the options below.
When something white is still left
Light gray or cream backgrounds. The option removes white. A background that is a pale tint, such as light gray or a soft cream, may be kept as its own shape. If the logo is one color, use Black and white shapes. Otherwise open the SVG in a vector editor and delete the leftover background shape by hand.
White inside the logo. The option only clears white that connects to the edge of the image. The white center of a ring or the inside of an "O" is enclosed by the logo, so it stays as a white shape. That is correct if the logo really has white there. If you want to see through it, use Black and white shapes, where the center becomes a hole. Or delete that white shape in an editor.
A fuzzy halo around the edge. Low quality JPGs leave a faint ring of in-between pixels. Raise Soften a little and raise Remove small specks, then check the edge again. A cleaner source file helps more than any setting, so look for a larger copy if you can.
What this will not do
The tool does not cut a logo out of a photo. If the picture has a busy background, the trace will turn that background into shapes, and no transparency option will fix that. Remove the background in an image editor first, save a clean PNG, then trace it.
It also will not recover a transparent version of a logo that only exists as a tiny screenshot. The trace can only use the pixels you give it.
Where to go next
If you are sending the finished file to a printer, an embroiderer or a sign shop, read why they ask for a vector logo. For the general steps of tracing an image, see how to vectorize an image in 5 steps.
Related tools
Keep reading
- GuidesWhy Printers and Sign Shops Ask for a Vector LogoScreen printers, embroiderers and sign makers ask for vector logos. Learn why, which formats they accept, and how to get one from a PNG or JPG.October 12, 2026 · 2 min read
- TutorialsHow to Vectorize an Image in 5 Steps (Free, No Software)A step-by-step way to vectorize a PNG or JPG into a clean SVG in your browser, with the settings that matter and the mistakes that ruin a trace.October 15, 2026 · 2 min read