How to Vectorize a Logo for Embroidery Digitizing
An embroidery shop asks for your logo as artwork before they stitch it. If all you have is a small PNG or a JPG off a business card, a clean traced SVG gives the digitizer something solid to work from. Here is how to prepare one, and where the job stops.
What an SVG does and does not do here
Embroidery machines read stitch files, not SVGs. Turning artwork into stitches is called digitizing. A digitizer, or digitizing software, decides the stitch type, direction and order for every area.
This tool does not make stitch files. What it does is give you a clean vector of the logo: sharp edges, flat color areas, and one shape per color. That is the part a digitizer would otherwise redraw by hand from a blurry picture. Ask your shop which artwork they prefer. Some take SVG directly. This site does not export EPS, AI or PDF, so if they insist on one of those, resave the SVG from a vector editor first.
Why color count matters more than usual
In print, an extra color is a few more dots of ink. In embroidery, each color is a separate thread, and each thread means the machine stops for a color change. Many shops also price by stitch count and thread changes, so a messy trace can cost real money.
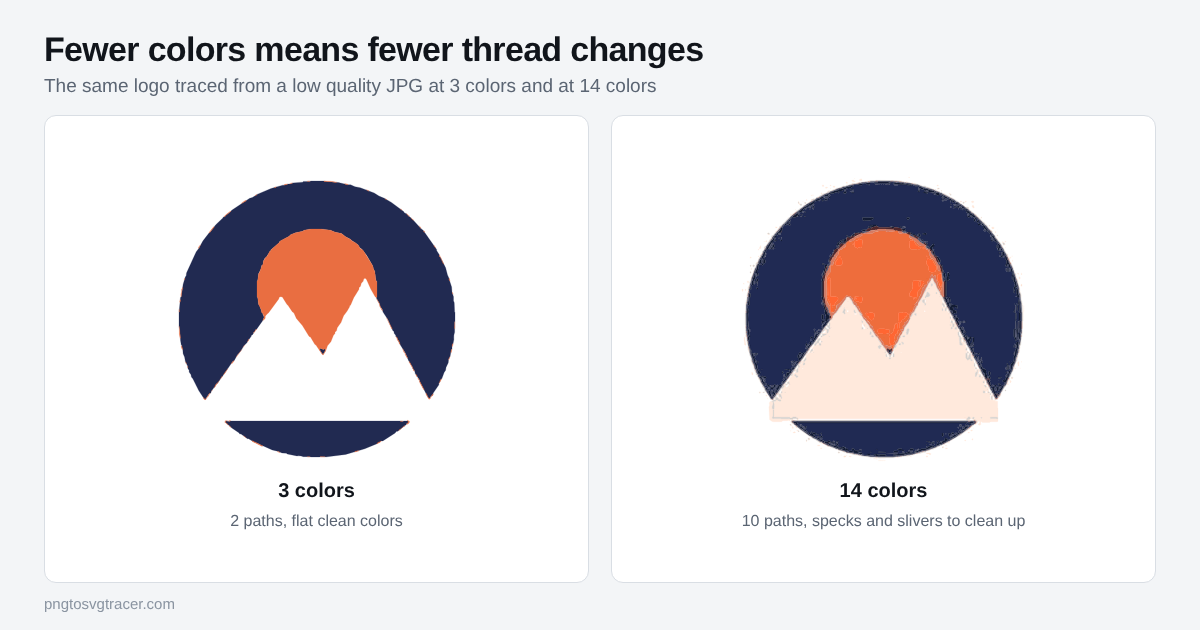
A logo that looks like 3 colors on screen is often 12 colors to a tracer, because JPG compression adds in-between shades around every edge. Those shades turn into tiny shapes. The picture above shows it: same source, and the 14 color trace is full of specks that someone has to clean out.
Steps
- Find the biggest, cleanest copy of the logo. A 1000 px wide PNG beats a 200 px one, and a PNG beats a JPG.
- Open the logo to SVG converter and drop the file in.
- Set Style to Logo or icon.
- Set Colors to the real number of thread colors you want. Count solid colors only. A white background is not a thread color, so leave Make white background transparent ticked.
- If the preview shows specks or fuzzy edges, raise Remove small specks and Soften a little. The steps are in how to fix a jagged trace.
- Compare the preview with the original. Check the thin lines and the letters.
- Download the SVG and send it with the original file.
Sending the original too is useful. The digitizer can check colors against it.
Things to fix before you send it
Thin lines. Embroidery thread has real width, so very thin strokes either vanish or turn into a heavy line. If your logo has hairlines, tell the shop. They may thicken them in the stitch file.
Small text. Tiny type is the most common problem, and tracing makes it worse, because small letters blur into the trace. Many digitizers suggest keeping lettering above roughly 6 mm (a quarter inch) tall, though the exact limit depends on the font and fabric, so ask your shop. If the text is small, send the font name as well, so they can rebuild the letters cleanly.
Gradients and shadows. The tracer turns a gradient into flat bands. That can work as a stylized look, but a digitizer will usually choose their own approach to shading, so a simpler flat version helps them most. A photo traced for stitching will come out posterized and is not a good starting point.
Close colors. Two shades of navy that you cannot tell apart on a shirt should be one color. Lower the Colors setting until they merge.
A quick check
Zoom into the SVG to several hundred percent. Each color area should be one smooth shape, with no confetti around the edges. If you can count the specks, the digitizer will see them too.
For the wider picture of what shops want and why, see why printers and sign shops ask for a vector logo.
Printing the same logo on shirts instead? Screen printing needs the art split by ink color. See screen printing separations from a PNG.
Related tools
Keep reading
- GuidesWhy Printers and Sign Shops Ask for a Vector LogoScreen printers, embroiderers and sign makers ask for vector logos. Learn why, which formats they accept, and how to get one from a PNG or JPG.November 3, 2026 · 2 min read
- TroubleshootingWhy Your SVG Trace Looks Jagged or Lumpy, and How to Fix ItWobbly curves, broken thin lines and noisy edges all have a cause. Here is what to change in a trace, setting by setting, to get a clean SVG.November 5, 2026 · 3 min read