How to Open and Edit an SVG in Inkscape (Free)
Inkscape is a free vector editor, and it opens SVG files natively. That makes it a good second step after tracing. The tracer turns your PNG or JPG into shapes, and Inkscape lets you recolor them, delete what you do not want and save the result.
Step 1: Trace the image
Open the SVG tracer and drop in your file. Use the biggest, cleanest copy you have.
- Pick Logo or icon for a flat logo. Pick Black and white for a signature or line art.
- Set Colors to the number of colors the artwork really has.
- Check the preview against your original. Raise Smoothing if edges look lumpy, and Remove small specks if you see stray dots.
- Download the SVG.
The image to SVG page runs the same trace if you came from there.
Step 2: Open it in Inkscape
Use File, then Open, and choose the SVG. You can also drag the file onto the Inkscape window. If a dialog asks about importing, choose to open it as a normal SVG document.
Press 5 to fit the page in the window, or 4 to fit the drawing. If the logo looks tiny on a big page, you will fix that in Step 5.
Step 3: Select and recolor a shape
Press S for the selection tool and click a shape. Open Fill and Stroke with Ctrl+Shift+F, then click the Flat color button and type a new hex code.
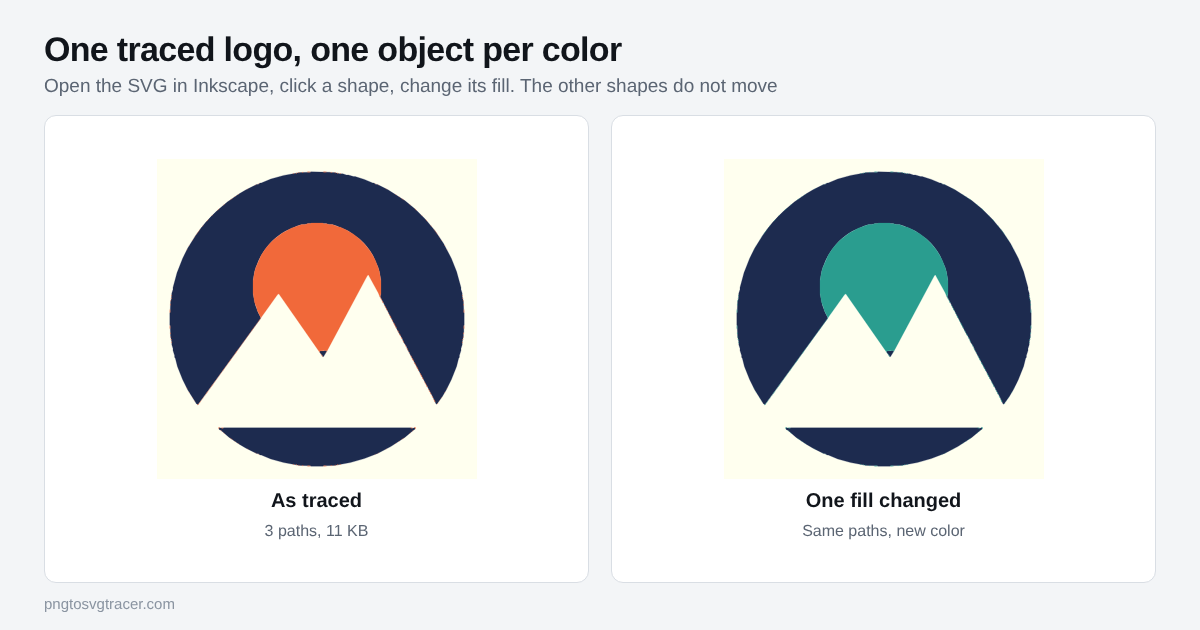
Each color in the trace is one path. In the picture above, the logo came out as 3 paths: the dark circle, the orange sun and the cream background. Changing the sun to teal took one click and one hex code. This is why a low color count matters. A 16 color trace of the same logo would give you many more shapes to recolor by hand.
To change every shape of the same color at once, select one and use Edit, then Select Same, then Fill Color.
Step 4: Delete the background
Many traces include the background as a shape. If you see a colored box behind the logo, click it and press Delete. If clicking selects the logo instead, click the box, then press Tab to step through objects until the right one is selected.
You can also avoid the problem at the source by ticking Make white background transparent in the tracer and tracing again. The full walkthrough is in how to make a transparent background SVG from a PNG.
Step 5: Resize the page to the artwork
Open Document Properties with Ctrl+Shift+D. Use the option to resize the page to the content, or press Shift+Ctrl+R in recent versions. Now the page is exactly the size of the logo, with no empty margin when you place it somewhere else.
Step 6: Merge or clean up shapes
- Join pieces into one shape: select them and use Path, then Union (Ctrl++). This is useful for a cutting machine where you want one outline.
- Combine shapes without merging: use Path, then Combine (Ctrl+K). Holes stay holes, which is what you want for letters like O and A.
- Fix a rough edge: press N for the node tool, click the shape and drag the nodes. Path, then Simplify (Ctrl+L) reduces the node count if the shape feels heavy.
Step 7: Save it
Use File, then Save As and choose Inkscape SVG to keep all your edits. If the file is going to a website, a cutter or another program, choose Plain SVG instead. It drops Inkscape's extra editor data and keeps the file smaller. For more on size, see how to make an SVG file smaller.
Common problems
The colors look different in another program. Check that the shape has a flat fill and not a leftover stroke. Select it and look at the Stroke paint tab.
Text is missing or changed. A traced SVG has no text at all. Letters become shapes. If you add text in Inkscape, convert it with Path, then Object to Path before sending the file to a printer or cutter, so it does not depend on a font.
Gradients are banded. The tracer makes flat color areas only. A gradient in the original turns into a few steps of color. Add a gradient fill in Inkscape yourself on the shape you want.
What this will not do
Inkscape edits the shapes you give it. It cannot make a blurry photo into clean art, and neither can a tracer. A photo comes out posterized, with flat blocks of color. Start from a clean flat image and the whole workflow stays quick.
Where to go next
Using Figma instead? See how to import an SVG into Figma. If you want to know what is inside the file you just edited, read what an SVG file is and how to open one.
Related tools
Keep reading
- TutorialsHow to Import an SVG into Figma (Trace, Place, Recolor)Trace a PNG or JPG logo into a clean SVG, drag it into Figma as vector layers, and fix common problems: extra layers, white boxes, specks and flat gradients.October 20, 2026 · 4 min read
- GuidesWhat Is an SVG File? Format, Uses and How to Open OneSVG is a vector image format used on websites, in design tools and by cutting machines. Learn what is inside one, how to open it, and when to use it.October 29, 2026 · 2 min read
- TroubleshootingHow to Make an SVG File Smaller: Fewer Points, Same LookTraced SVGs can get huge. Learn which settings shrink the file the most, what to remove, and how small a clean logo SVG should really be.October 12, 2026 · 2 min read