How to Import an SVG into Figma (Trace, Place, Recolor)
A PNG logo is just pixels in Figma. You can place it, but you cannot change a color or move a single curve. An SVG comes in as vector layers instead, so you can recolor it, resize it and export it again. The catch is that the quality of those layers depends on how the SVG was made.
Step 1: Trace the logo
Open the PNG to SVG for Figma page and drop in your PNG or JPG. Start from the biggest, cleanest copy you have. A small screenshot gives rough edges in any tracer.
- Set Style to Logo or icon. Use Black and white for a signature or a one-color line icon.
- Set Colors to the number of colors the logo really has. A three color logo should be three colors.
- Compare the preview with your original. If the edges look lumpy, raise Smoothing a little.
- If you see stray dots, raise Remove small specks.
- Download the SVG.
The image to SVG page runs the same trace if you do not need the Figma notes.
Step 2: Bring it into Figma
Drag the SVG file from your computer onto the canvas. You can also copy the SVG code and paste it, or use File, then Place image. It arrives as a group of vector layers. Click into the group and select a shape to see its fill in the right-hand panel.
Scale it from a corner with Shift held to keep the proportions. It stays sharp at any size, because Figma is drawing shapes and not stretching pixels.
Why the number of colors matters here
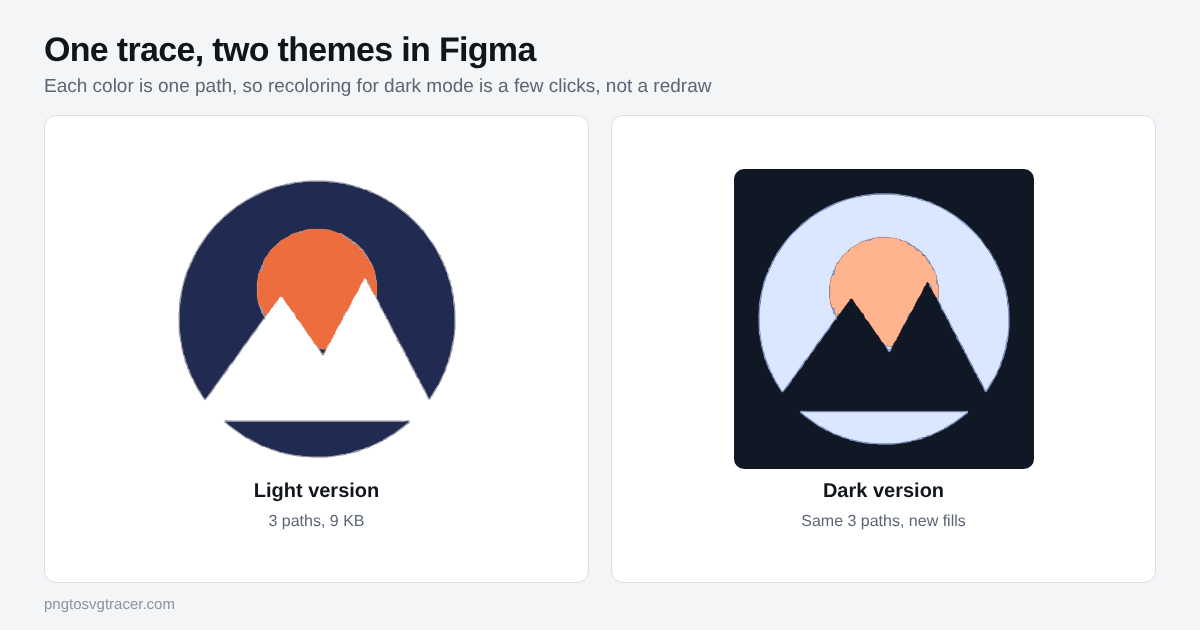
Each color in the trace becomes one path. That is the whole reason this works well in Figma. In the picture above, a noisy JPG logo traced with 4 colors, Soften at 3 and Remove small specks at 14 came out as 3 paths and about 9 KB. Recoloring it for a dark theme meant changing three fills.
Trace the same file with 16 colors and no cleanup and you get many more shapes, most of them pale halos from JPG compression. Then every recolor turns into a hunt through the layers. Fewer colors means fewer layers and a file you can actually work in.
Fixing common problems
There are far too many layers. Lower the Colors slider, raise Remove small specks, and trace again. Doing it at the source is faster than deleting shapes in Figma. If you only need one shape, select the layers and use Flatten to merge them.
A white box sits behind the logo. The trace kept the white background as a shape. Tick Make white background transparent and trace again. The full walkthrough is in how to make a transparent background SVG from a PNG. To check, place the logo over a colored frame. If a square shows, the background is still there.
The logo has little gray dots around it. These are usually JPG noise. Raise Soften, then Remove small specks, and trace again. A clean PNG source avoids most of this.
Gradients turned into bands. This tool makes flat color areas only. A gradient in the original becomes a few steps of color. Import the flat shape, then add a gradient fill in Figma yourself, or keep the gradient part as an image.
Lines change thickness when you resize. A trace gives you filled shapes, not strokes, so a thin line is a thin shape. If you need an editable stroke, redraw that line in Figma. For most logos, scaling the whole group is fine.
The file feels heavy. See how to make an SVG file smaller. The same settings that cut layers also cut file size.
Tidy up before you share the file
Rename the group to something readable, like logo-primary. Make a second copy for the dark theme and change the fills there. If the logo will be used in many frames, turn it into a component so one edit updates every copy. Both steps take a minute and save a lot of confusion later.
What this will not do
A trace turns a flat logo into clean vector shapes. It does not turn a photo into an editable illustration. Photos come out posterized, with flat blocks of color where the smooth tones were. Use the photo as an image fill in Figma and keep tracing for logos, icons and line art.
Where to go next
Using Canva instead? The steps are in how to import an SVG into Canva. Prefer a free desktop editor? See how to open and edit an SVG in Inkscape. If you are not sure what is inside the SVG you just made, read what an SVG file is and how to open one.
Related tools
Keep reading
- TutorialsHow to Import an SVG into Canva (and Fix Common Problems)Trace a PNG or JPG logo into a small SVG, upload it to Canva, and fix the usual problems: rejected files, white boxes, wrong colors and rough edges.October 19, 2026 · 4 min read
- TutorialsHow to Make a Transparent Background SVG from a PNGTurn a PNG or JPG logo into an SVG with no white box behind it. Which setting to use, how to check it worked, and what to do when a pale background stays.October 20, 2026 · 4 min read
- TroubleshootingHow to Make an SVG File Smaller: Fewer Points, Same LookTraced SVGs can get huge. Learn which settings shrink the file the most, what to remove, and how small a clean logo SVG should really be.October 12, 2026 · 2 min read