How to Turn a Photo into a Stencil (Black and White SVG)
A stencil is one color and a lot of holes. A photo is hundreds of grays. Making a stencil from a photo means deciding which parts become paint and which parts stay empty, then tracing that choice into a clean SVG.
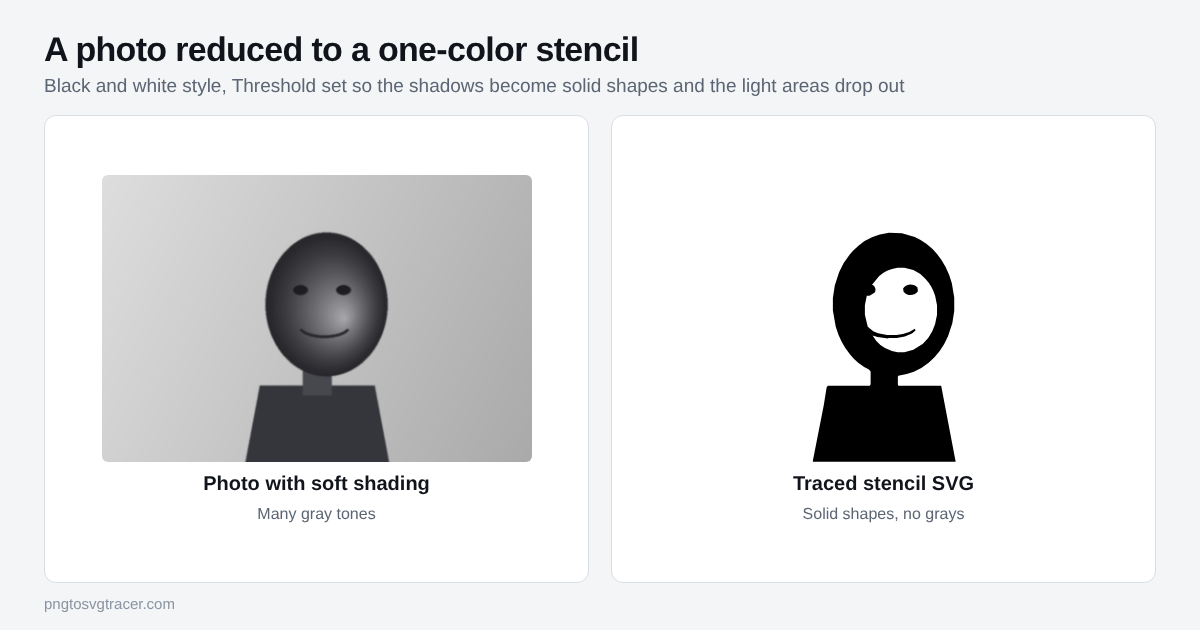
Pick a photo that already has strong shadows
The tracer only sees dark and light. It cannot invent contrast that is not in the photo.
- Side light works best. A face or object with a clear shadow side gives the tracer a shape to follow.
- A plain background helps. A busy background turns into busy black shapes.
- Close crops beat wide shots. A face filling the frame traces better than a face in a crowd.
- Skip flat, foggy photos. If everything is mid-gray, no threshold will split it well. Raise the contrast in your phone's photo editor first.
Trace it in black and white
- Open the photo to SVG page and drop in your photo.
- Set the style to Black and white shapes. The default Photo style keeps several colors, which is the opposite of a stencil.
- Move the Threshold and watch the preview. A lower number keeps only the darkest shadows. A higher number turns more of the picture black.
- Stop when the main features read at a glance: eyes, edges of the face, the outline of the object.
- Raise Remove small specks to clear the dots.
- Download the SVG.
Try three or four threshold values and compare. The right one is usually lower than you expect, because a stencil with too much black stops looking like the subject.
Bridges and islands
This is where stencils fail in real life. Look at the traced preview and ask what holds each piece in place.
Islands. A solid shape surrounded by an empty hole, such as the center of the letter O or an eye with a pupil, has nothing holding it. In a cut stencil it falls out. In the picture above, the white area inside the head is a hole with nothing connecting it to the rest, which is fine for a spray stencil you will use once but not for one that has to stay in one piece.
Bridges. The fix is to leave thin connections, called bridges, that join the floating piece to the main body. You add them in your vector editor, or by drawing a line across the gap in the source photo before you trace. Make them wide enough to survive weeding or washing.
Make it cuttable
A trace can have thousands of tiny shapes. A cutter follows every one of them.
- Raise Remove small specks until the dust is gone but the real details remain.
- Raise Smoothing a little so edges are not lumpy. If curves look jagged, this fix for jagged traces explains what to change.
- Look at the thinnest parts at the real size. If a line is thinner than the material can hold, make it bolder or leave it out.
When you are ready, the steps for importing the file are on the SVG for Cricut page.
Which material and which cut
A stencil made from a photo has a lot of fine detail, so the material matters. Adhesive vinyl and thin stencil film cut well. Paper tears easily. Thick card and wood need a machine that can handle fine detail, so check what yours can do with small features before you commit a good sheet.
For spray paint or fabric paint, press the stencil down flat and use light coats so paint does not creep under the edges.
Test before the real piece
Cut a small version on scrap first. A stencil that looks right on screen can lose a thin bridge or a small island in real life. Fixing the SVG after a test costs nothing, and fixing a ruined shirt costs a lot.
What this will not do
A black and white trace has no gray. Soft shading becomes solid black or disappears completely. If you want a few tones, a multi-color trace gives you layers, but each color is another stencil to cut. The tracer works on the pixels it is given, so a small or blurry photo gives lumpy edges. Use the original file, not a screenshot.
If your starting point is a drawing instead of a photo, the capture tips in how to trace a pencil sketch into an SVG apply here too. For sticker projects, see how to make Cricut stickers from a photo or drawing.
Use photos you own or have permission to use. A picture of a person or a brand is not free to copy just because you can trace it.
Related tools
Keep reading
- Maker workflowsHow to Make Cricut Stickers from a Photo or DrawingTurn a photo, drawing or logo into a cut-ready SVG for Cricut stickers. What to prepare, how to trace it, and how to avoid slow, messy cuts.October 26, 2026 · 2 min read
- TutorialsHow to Trace a Pencil Sketch into an SVGTurn a pencil sketch into a clean SVG line drawing. How to photograph it, set the threshold for light graphite, and fix gray paper, smudges and broken lines.October 25, 2026 · 4 min read
- TroubleshootingWhy Your SVG Trace Looks Jagged or Lumpy, and How to Fix ItWobbly curves, broken thin lines and noisy edges all have a cause. Here is what to change in a trace, setting by setting, to get a clean SVG.November 5, 2026 · 3 min read