WebP to SVG: What to Do With Logos Saved From Websites
You right-click a logo on a website, save it, and the file ends in .webp. Your cutting software, print shop or older design program will not open it. You do not need to convert it to PNG first. You can trace it straight to an SVG.
Why you get WebP
Many sites serve images as WebP because the files are small. When you save from the page, you often get that format. It is a normal image file, just one that a lot of desktop tools were slow to support. The pixels are the same kind of pixels you get in a PNG or JPG, so tracing works the same way.
Step 1: Check which kind of WebP you have
WebP comes in two flavors, and it changes how much work you need to do.
- Lossless WebP keeps every pixel. It traces about as cleanly as a PNG.
- Lossy WebP squeezes the file by smearing detail, much like a JPG. Edges get a faint halo and flat colors pick up blotches.
You cannot always tell by the file name. Zoom in on the logo. If the edges are crisp, it is probably lossless. If you see soft fringes and blocks around the shapes, treat it as lossy.
Step 2: Trace it
Open the WebP to SVG tool and drop in the file. It starts on the Logo or icon (few colors) style, which is right for nearly every logo. Check the preview with the comparison slider before you change anything. A lossless file may already look done.
If the edges look rough, change these in order:
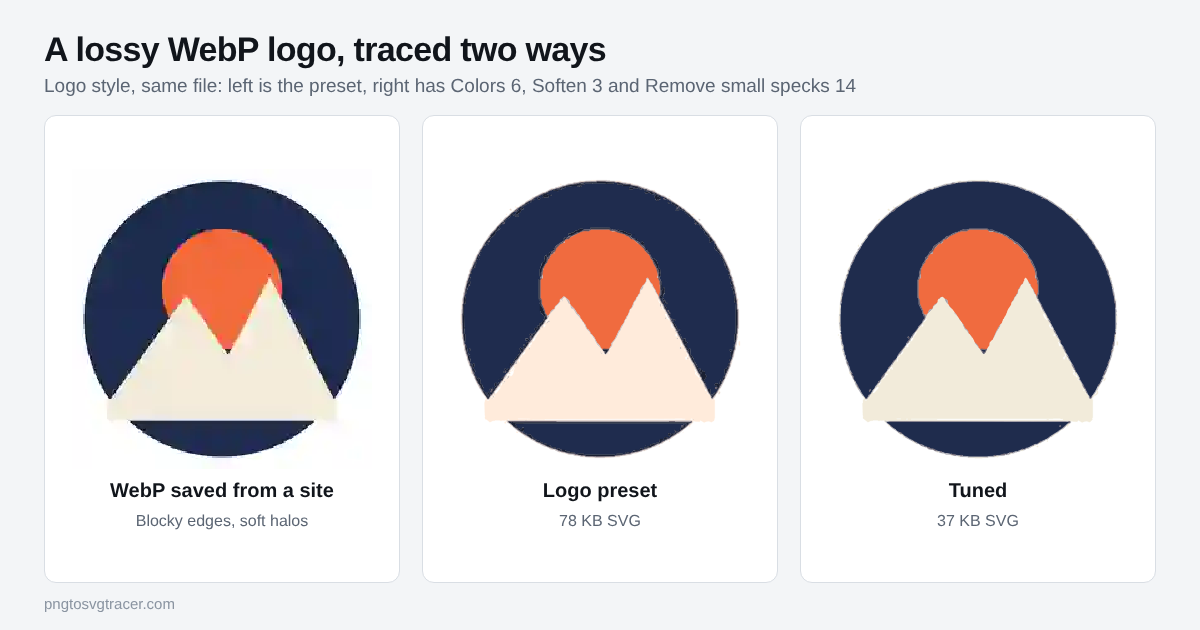
- Colors. Count the flat colors in the logo and set it to that number, plus one if a pale color is getting lost. In the figure above, the logo has navy, orange and cream plus white. Six colors kept the cream mountain. Fewer colors blended it into the background.
- Soften. Raise it to 2 or 3. This melts the compression halo before tracing.
- Remove small specks. Raise it from 8 to about 14 if you see crumbs around the edges.
The same fixes apply to JPG files, and the JPG logo settings guide walks through each one in more detail.
Step 3: Handle the background
Lots of WebP logos have a transparent background. The tool keeps transparent areas empty in the SVG, so you should see only the logo shapes. If your logo was flattened onto white, the trace may include a white box. Tick Make white background transparent to drop it. If that also removes a pale part of the logo itself, leave it off and delete the white shape in your editor instead. The transparent background guide covers both routes.
What to expect
Be honest about the source. A trace can only work with the pixels it is given.
- A logo that is at least a few hundred pixels wide usually traces well.
- A tiny WebP, like a 100 pixel avatar, will give you blocky shapes. Look for a larger copy first, such as the site's press page, an app store listing or an old email signature.
- Animated WebP files use only the first frame.
- Photos come out posterized. This tool is built for logos, icons and flat artwork.
Step 4: Check and download
Before you download, look at three places: the thinnest line, a sharp corner and the area just outside the shapes. If all three look right, download the SVG. If the file is bigger than you expected, lower the color count or see how to make an SVG file smaller.
Quick reference
| Problem | Change |
|---|---|
| Halo or fuzzy edges (lossy WebP) | Raise Soften to 2 or 3 |
| Stray dots around the logo | Raise Remove small specks |
| Pale color missing | Raise Colors by one |
| Too many shapes, heavy file | Lower Colors |
| White box behind the logo | Tick Make white background transparent |
| Blocky shapes from a tiny file | Find a larger source |
Only use a logo you have the right to use. A trace of someone else's brand is still their brand. If it is your own logo and you lost the original file, this is a fast way to get a working vector back.
Related tools
Keep reading
- TutorialsBest Settings for Tracing a JPG Logo into a Clean SVGA JPG logo traces worse than the same logo as a PNG. These are the settings to change first, in order, and what each one does to the result.October 28, 2026 · 3 min read
- TutorialsHow to Make a Transparent Background SVG from a PNGTurn a PNG or JPG logo into an SVG with no white box behind it. Which setting to use, how to check it worked, and what to do when a pale background stays.October 20, 2026 · 4 min read
- TroubleshootingHow to Make an SVG File Smaller: Fewer Points, Same LookTraced SVGs can get huge. Learn which settings shrink the file the most, what to remove, and how small a clean logo SVG should really be.October 12, 2026 · 2 min read