Why Your Traced Logo Has a White Box and How to Remove It
You traced a logo, ticked the option that makes the white background transparent, and there is still a box behind it. That means the box is not plain white, or it is not where you think it is. Here is how to find out which kind you have.
Step 1: find out what the box is
Do not guess from the preview. A box that matches the page looks like nothing. Open the downloaded SVG over a color instead. Place it on a colored slide, a colored shape in Canva, or the dark canvas in Figma. If you use Figma, click the box. A stray rectangle or a group of small squares shows up as its own layer, which tells you what was traced. The steps are in how to import an SVG into Figma.
Now match what you see to one of these.
Cause 1: the background is not pure white
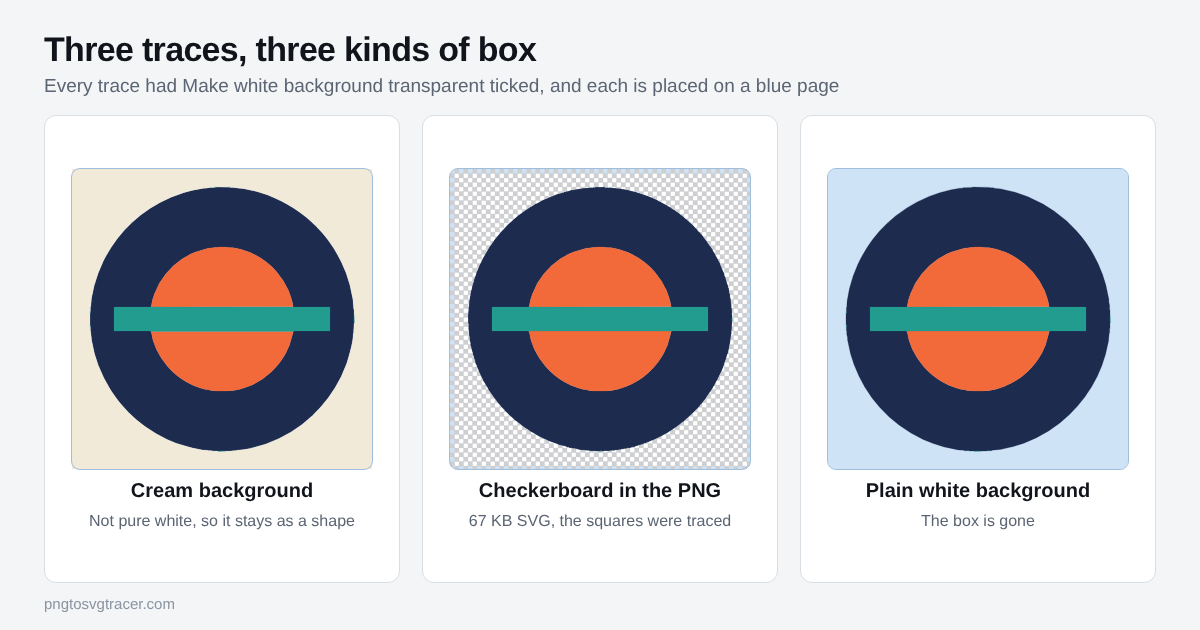
This is the most common one. The option on the PNG to vector page clears white that touches the edge of the image. Cream, light gray, a faint blue or a paper tint is a color, so the tracer keeps it as a shape. In the picture above, the cream square stayed even with the option on.
Fix it one of three ways:
- If the logo is one color, switch Style to Black and white shapes. Light pixels become empty space, so no background shape is drawn.
- If the logo has several colors, open the SVG in a vector editor and delete the big background shape. It is the largest one and sits at the back. Inkscape is free.
- Or clear the background first. The free Transparent PNG tool removes one solid color and saves a PNG, and the steps are in how to make a PNG transparent before tracing. Then trace the new file.
Cause 2: the checkerboard is part of the picture
Many people save an image from a web page or a screenshot of a design tool with the gray and white squares showing. Those squares are not transparency. They are pixels. The tracer reads them like any other pixels and draws every square.
You can spot this two ways. The SVG comes out far larger than it should, and the box in your editor is made of many small shapes instead of one. In the test for the picture above, the clean trace was a few KB and the checkerboard trace was about 67 KB for the same badge.
There is no setting that fixes this reliably. Get a real transparent PNG from the original source, or cut the logo out in an image editor and save it with transparency. Then trace the new file.
Cause 3: the file is a JPG
JPG cannot store transparency. Every JPG logo arrives with a solid background, and the edges of that background are slightly off-white from compression. Pure white clears fine. A near-white fringe may leave a thin outline or a few specks.
Raise Soften a little and raise Remove small specks. The JPG logo settings guide shows the order to try them in. If you can find the original PNG, use that.
Cause 4: the white is inside the logo
The option only removes white that connects to the outside edge of the image. White inside a ring, or the center of an "O", is enclosed by the artwork, so it stays. That is usually correct, because the logo really has white there.
If you want to see through it, use Black and white shapes, where the center becomes a hole. Or select that one white shape in an editor and delete it.
Quick reference
| What you see | What it is | Fix |
|---|---|---|
| One solid square, off-white | Pale background kept as a shape | Black and white shapes, or delete the shape |
| Many small squares | Checkerboard saved as pixels | Get a real transparent PNG |
| Faint outline or specks | JPG compression | Raise Soften and Remove small specks |
| White inside letters or rings | Enclosed white | Black and white shapes, or delete it |
| One white square, option unticked | Option is off | Tick Make white background transparent |
What no setting will do
If the logo sits on a photo or a busy background, the tracer turns that background into shapes. Remove it in an image editor first. The tool traces the pixels you give it and does not cut subjects out.
Next steps
The basic walkthrough for the option is in how to make a transparent background SVG from a PNG. Once your SVG is clean, it works as a browser tab icon too, as covered in how to make a favicon from a logo SVG.
Related tools
Keep reading
- TutorialsHow to Make a Transparent Background SVG from a PNGTurn a PNG or JPG logo into an SVG with no white box behind it. Which setting to use, how to check it worked, and what to do when a pale background stays.November 8, 2026 · 4 min read
- TutorialsBest Settings for Tracing a JPG Logo into a Clean SVGA JPG logo traces worse than the same logo as a PNG. These are the settings to change first, in order, and what each one does to the result.November 12, 2026 · 4 min read
- TutorialsHow to Import an SVG into Figma (Trace, Place, Recolor)Trace a PNG or JPG logo into a clean SVG, drag it into Figma as vector layers, and fix common problems: extra layers, white boxes, specks and flat gradients.October 20, 2026 · 4 min read